To make your RoboBrrd do whatever we want it to do, we need to give its brain some instructions. This is known as programming!
RoboBrrd's brain uses an Arduino Pro Mini 5V at 16 MHz with an ATmega328. This means that it is Arduino compatible, so we can use the Arduino IDE to program it!
If you have not done so already, you will need to download and install the Arduino IDE. You can follow the instructions on the Arduino webpage on how to install it for your specific operating system.
In order to program your RoboBrrd, you will need a FTDI cable or adapter, like the FTDI friend or FTDI cable.
In the following steps, we will start off by installing the RoboBrrd Arduino library and uploading an example sketch and seeing it run. We will then dive in to explaining the various portions that make up the boilerplate code.
If this is your first time playing with an Arduino, here are some tutorials that we recomment to help you become more familiar with the environment.
OK, the first thing that we should do before proceeding any further is run a blink test. Make sure everything has been soldered together, from the previous section. Plug in your Arduino to the computer and open the Arduino IDE.
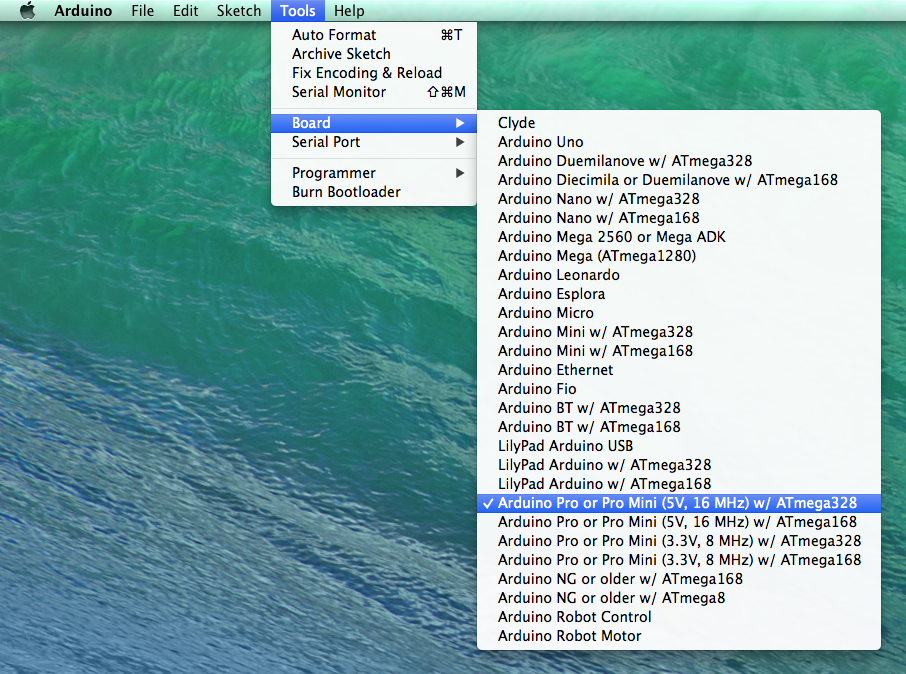
1. In Tools > Board select Arduino Pro Mini (5V, 16 MHz) w/ATmega328
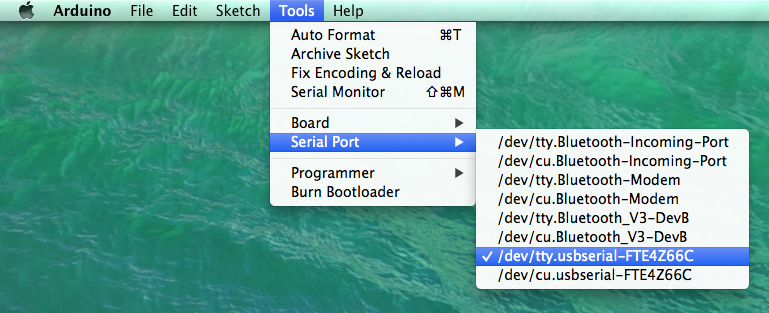
2. In Tools > Serial Port select the port that the Arduino is connected to.
(If you don't know which one, unplug the Arduino and close the menu then open it again. The one that disappeared was the port connected to the Arduino.)
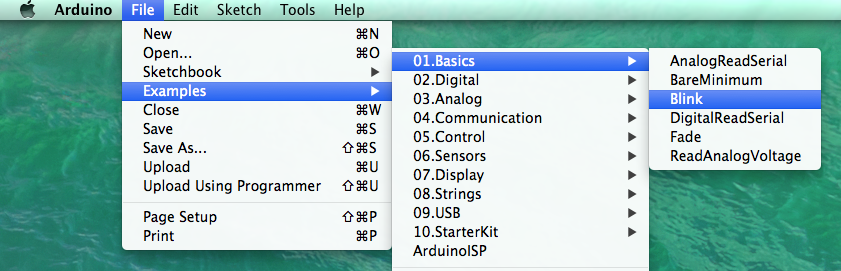
3. Open the blink example code by going to File > Examples > Basics > Blink
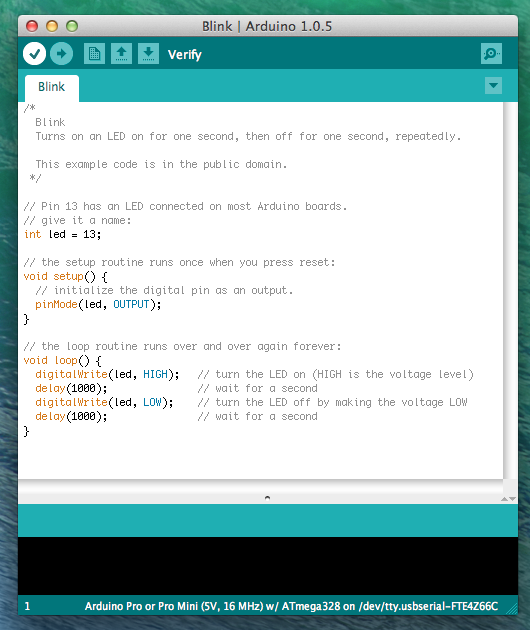
4. Press the Verify button (top left, checkmark)

5. Press the Upload button (next to Verify, right arrow)

6. Wait for it... Done uploading! YEA! w00t w00t!
If you have encountered any errors during this step, it is important to investigate and fix them. Going any further with any errors would be detrimental to the overall experience, not to mention incredibly frustrating.
Before we venture on to the next step, we just wanted to show you the Serial Monitor. This will come in handy later on. The Serial Monitor displays any print commands that the Arduino is outputting.
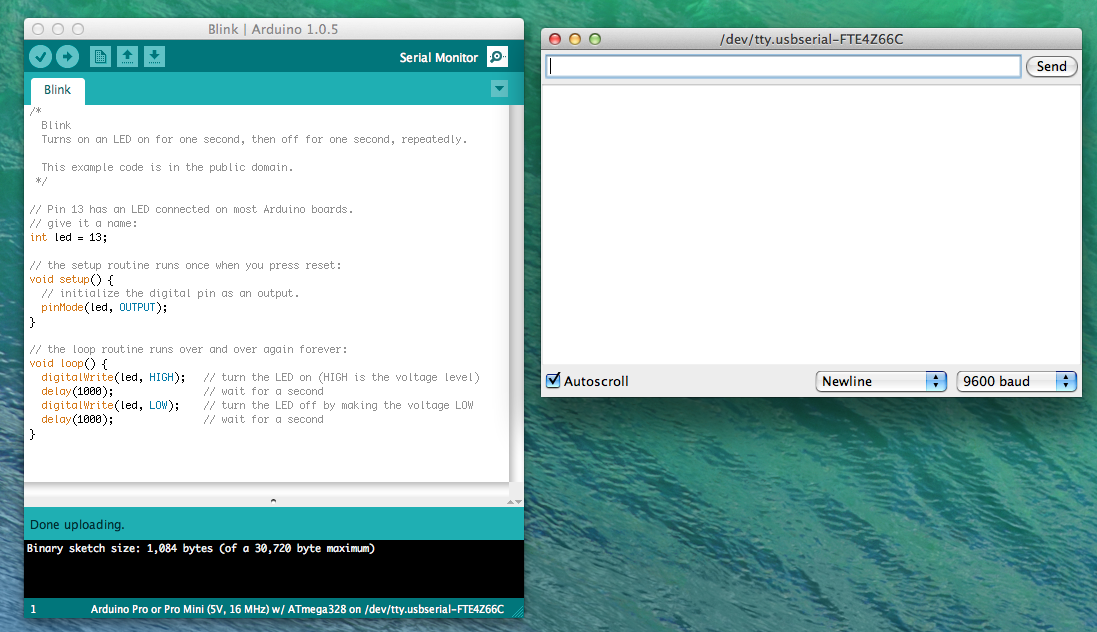
7. Open Serial Monitor (top right, circle symbol thingy)
There won't be any text displayed on the Serial Monitor right now, but we will be using this in the upcoming steps, so it was good to look at this now :)
We created an Arduino library for RoboBrrd to make it easier to access common actions, like reading the sensors or waving the wings up and down. Hopefully you will find it useful too! There are a few steps to follow, so let's get started!
1. First, close the Arduino IDE and download the RoboBrrd Library
2. Rename the downloaded folder to just 'RoboBrrd'. Install the library to your Arduino/libraries folder. For more info on how to install a library, please see here.
3. Download and install the Streaming library
4. Download and install the Promulgate library
5. Open the Arduino IDE again, and check that you see the RoboBrrd library in File > Examples.
And that's it for installing the libraries! It is a little bit of legwork, but now we can get going with looking at some of the code.
First up, let's look at one of the example sketches for RoboBrrd. It's called down by the bay, based off of the poem (it is a poem, right?) or the annoying song.
1. Go to File > Examples > RoboBrrd > DownByTheBay to open the example sketch
2. Verify the sketch to make sure there are no issues
3. Upload the sketch to RoboBrrd's brain
4. Open the Serial Monitor and set it to 9600 baud
5. Finally, observe the behaviour! RoboBrrd should perform some movements, and also output the lyrics on the Serial Monitor!
If your RoboBrrd is moving and outputting the text to the Serial Monitor, this is a good sign. Don't worry just yet if it is not moving perfectly. We are taking steps towards getting your RoboBrrd dancing around!
Feel free to try out some of the other example sketches as well. There are three fun ones: DownByTheBay (which we just went through), DanceyDancey, and Fun.
Coming soon: We will be going through how to create our own sketch based off of the RoboBrrd Boilerplate example, to do some simple things and give you a taste of how it all works.


