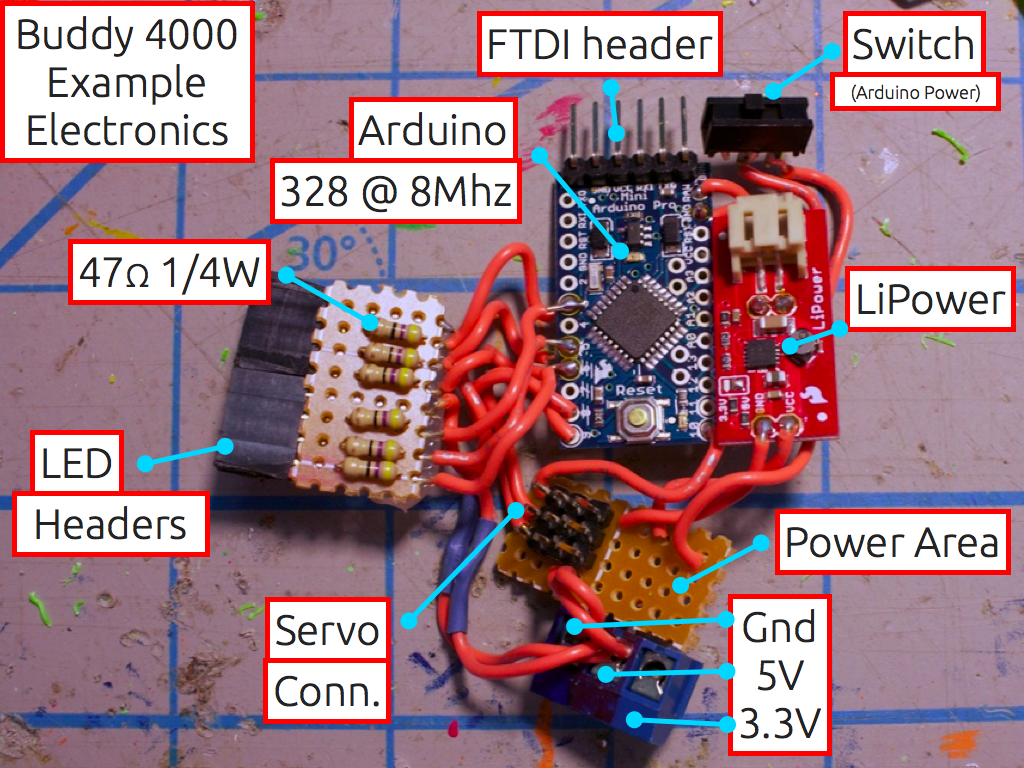
Electronics Description
Power
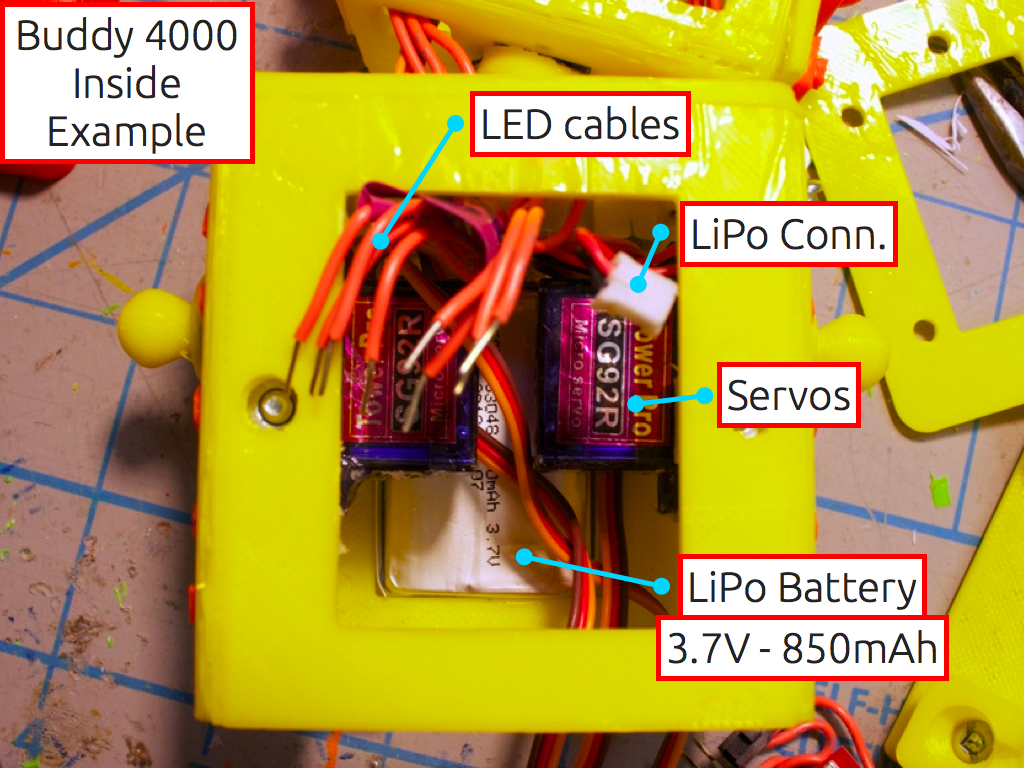
The robot is powered off of a single LiPo battery, 3.7V 850mAh. This is used for both the servo power and Arduino power. The battery plugs into the LiPower board, which has wires from the 3.7V side going into the Vin and Gnd of the Arduino. On the other end of the LiPower board are wires from the 5V side going into the 'Power Area' perf board.
The Power Area perf board has a screw terminal for Gnd, 5V, 3.3V. The servos and LEDs (Common Anode) are powered by the 5V connection. There is a wire from the Arduino's VCC to the 3.3V terminal.
The power switch makes the connection for the 5V line. (Meaning, yes, the microcontroller is still powered. This is something to be improved in the future)
Servos
There are three servos used in this robot. The headers for plugging in the servos are broken out on the same 'Power Area' perf board. Each header has a signal pin that connects onto the Arduino.
To control the servos, we use the Servo library. Since Servo library uses Timer1, we connect the servos to pins 9 & 10, and 11 (the last pin can be whichever you choose really). Pins 9 & 10 normally have PWM disabled when using the Servo library, so it's good to put them to use for the servos.
The power for the servos comes from the 5V out of the LiPower board, from the LiPo battery. Sometimes when moving quickly or all servos moving at once, you may notice the LEDs and power fluctuating. If you were to use a sepparate battery for the servos and microcontroller, this would not be noticable.
LEDs
The LEDs used in this example are Common Anode. There are 47 ohm resistors on each of the colours. Choice of resistor was based on what resistors were in my box- you can choose more suitable values for your LEDs.
Both red, green, and blue leads from the two LEDs go to the same pins. This decision was made in order to save on pins, and provide the LEDs with PWM capability.
Arduino
Apart from the details already discussed, the Arduino's FTDI header is where it is programmed. Meaning, it is useful to attach wires and a header to this so that it can still be reachable while inside the robot.
The 328 @ 8MHz might be a little overkill for this robot, you can probably use a smaller microcontroller and still have the nice smoothed motions and everything. For now, this is what we are using.


 Store
Store Robots
 Learn
Learn Community