Botbait and the Space Fish


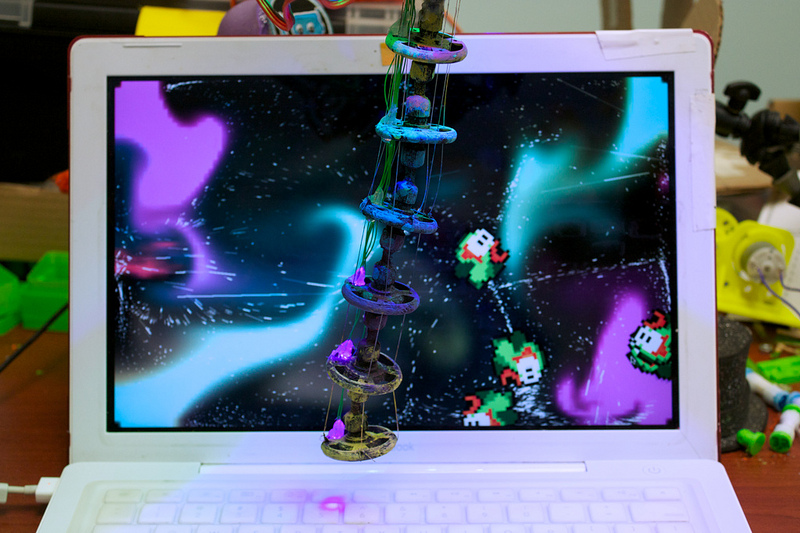
One of the ways Botbait enjoys spending its time is by playing with fish (of course)! These fish live in a special habitat... SPACE! They float around the cosmic-coloured waves and go wherever the 'water' current directs them.

Botbait keeps an eye out for when there are four or more fish near its tail. When there is, it will swoosh its tail to disturb them. The fish swim away, but eventually make their way back. If one of Botbait's buttons are pressed, then it will gently swish its tail.

Download


Botbait and the Space Fish is an interactive application made in Processing. You can download the pre-compiled applications or download the sketch and run it for use with your own Botbait!

Mac OS | Windows | Linux: 32 Bit, 64 Bit


Check out the source

To get connected to Botbait, when the application is running, press 'h' on your keyboard to reveal/hide the serial ports dropdown menu. Select the port that Botbait is connected to, then press 'connect'.

You will also need to add some code to your Botbait, this is explained in further detail below.


Donationware


Botbait and the Space Fish is donationware. We ask for your help so we can continue developing fun robots on this journey of re-imagining the world where kids can build their own robots, modify them, and view the source.

If you enjoy the software, feel free to donate. All donations will receive a special commemorative photograph of Botbait saying hello to you.

Donate!

Arduino


Getting the Arduino inside of Botbait to talk with the Processing application will require edits to the code. We tried to make it as straight-forward to implement and get going quickly.

First, go and grab the code below and open it alongside your existing code for Botbait.


Check out the example sketch

The first thing you will need to do is create a new tab on your existing code and name it Communication.

Open the example sketch to the Communication tab, copy it and then paste it into your existing code.

Let's go through the code to see what it is doing.

The array rxCmds is used to store the characters that describe commands sent from the Processing sketch to the Arduino. For example, FF is used to send the number of fish that are within the middle area (aka: close to Botbait's tail).

The array txCmds is used to store the chars that describe commands sent to the Processing sketch from the Arduino. For example, IN is used to send a gentle swoosh of the tail that disturbs the fish (aka: a small force is applied to the simulation).

listenForMessage() is the function that listens on the Serial line for the commands from the Processing sketch. It will obtain the command and the value sent with it. Later, it calls parseMessage.

parseMessage(int cmdRow, int valResult) is the function that is called when the message has been parsed into a command and value. cmdRow represents the index in the array rxCmds. valResult was the value that the message contained.

It is here, in parseMessage that you will want to tell Botbait what to do. For example:

switch(cmdRow) {
   case 2: { // number of fish in middle
     
     for(int i=0; i<LEDQTY; i++) {
       if(i < valResult) {
       // turn on LEDs
       } else {
       // turn off LEDs
       }
     }
     
     if(valResult >= 4 && millis()-lastFishCatch >= 1500) {
       // do animation

       // send the disturbance to the Processing sketch
       sendMessage(1, 0);

       lastFishCatch = millis();
     } else if(valResult >= 2) {
       // do a short animation
     } 
   
   }
   break;
 }
		

The best part is that you can customise it in any way you want for your Botbait. Maybe you want Botbait to go crazy when there are only 3 fish nearby? Or have it blink like crazy when there are 5!

Last but not least, sendMessage(int cmdRow, int val) is used to send the characters of the txCmds at index cmdRow, with the value of val to the Processing sketch.

---

Make sure that you add a call to listenForMessage(); in your loop() function, so that Botbait can listen to the messages from the Processing sketch.

Processing


The Processing sketch itself doesn't need any modifications to run ... but you should definitely modify it, customize it to your heart's content and learn more! For that reason, here we will explain what is going on in the sketch.

To start off, this sketch uses the MSAFluid library. That is where all of the magic comes from. MSAFluid creates a fluid-dynamics simulation.

The core communication code is in the Arduino tab of the sketch. It is quite similar to the core communication code on the Arduino side as well.

The variables listed under // -- SEND -- // are the commands that are sent from Processing to the Arduino. For example, the number of fish that are near Botbait's tail.

Likewise, the variables listed under // -- RECEIVE -- // are the commands that are sent to Processing from the Arduino. For example, the disturbances of Botbait's tail swooshing.

readData() listens for the messages received on the Serial line. When it parses the command and value, it calls parseCommand.

parseCommand(String cmd, String val) uses the command and value from the message received from the Arduino to make the Processing sketch do something! For example:

if(cmd.equals(disturbSerial)) {
    if(val != "" && val.length() < 5) receivedValue = (int)Integer.parseInt(val);
    for(int ii=0; ii<receivedValue; ii++) {
      disturbance();
    }
  } else if(cmd.equals(inkSerial)) {
    inkance();
  }
		

In this case, disturbance() and inkance() are both functions that add forces in specific places to make the fluid move.

Last but not least, is sendSerial(String sl, int val). This is used to send the messages from Processing to Botbait. ---

Be sure to call readData(); in your draw() function, so that the Processing sketch can listen for the messages from Botbait.

Water


This section is titled 'Water' for lack of a better title. Essentially here I will be describing the various ways the fluid dynamics simulation is effected. The corresponding functions can be found in the Water tab.

initOcean() & doInitOcean()
When the sketch first starts, there are several forces that are added. These forces originate from the four sides and are directed inwards. The addition of these forces is actually repeated 10 times (pausing 10ms in between).

This is done because the space needs to get started! Without it, there would be no initial mix of colours to start things off. It also makes the fish move about to different locations.

doBlurps()
Blurps is a word that is used often in this sketch. Our rough definition of it is some sort of small force. In this case, the forces from doBlurps are in random positions, with a small random strength.

These blurps are added to make sure that the 'ocean' keeps moving around and doesn't become too stagnant.

doCornerBlurps()
Corner blurps are added every 1 second to the sequential corner. A force emits from the corner towards the center.

These blurps were added to make sure that none of the fish get 'stuck' in the corners too often. It was added after observing that whenever Botbait would 'swoosh' its tail causing a disturbance, the fish would remain in the corners.

doSideBlurps()
Side blurps are added every 500ms to each sequential side. A force emits from the middle of the side, towards the center.

The side blurps were added because after adding the corner blurps, the fish would then become stuck on the sides.

disturbance()
Disturbance adds a force starting in the middle of the screen at a random y position. It emits diagonally, either upwards to the left or downwards to the right.

This was added to mimic a small swoosh of the tail that Botbait would do. Not as intense as inkance.

inkance()
Inkance adds a row of forces down the middle, emitting to opposing sides.

This was added to mimic what would happen when Botbait swings its tail back and forth. Essentially, scaring all of the fish away!

Fish


The fish are essentially extra particles in the fluid dynamics simulation that do not get removed after some time. Their position is calculated by MSAFluid. The rotation uses the velocity of the particle. Let's look into more about how this was done.

Rotation
The first part on figuring this out was to determine the angle that the fish should be. By using the velocity vector and the atan2 function, we can get the angle.

fishAngle[i] = atan2(particleSystem.fishParticles[i].vy, particleSystem.fishParticles[i].vx);

This is great, now that we have the angle. But as for actually rotating the image, we have to apply some transformations. Here is the core of that code:
pushMatrix();
    translate(width/2, height/2);
    translate(-width/2+particleSystem.fishParticles[i].x, -height/2+particleSystem.fishParticles[i].y);
    //rotate(radians(mouseY));
    //rotate(counter*TWO_PI/360);
    if(abs(particleSystem.fishParticles[i].vy) >= 1.0 || abs(particleSystem.fishParticles[i].vx) >= 1.0) {
      fishAngle[i] = atan2(particleSystem.fishParticles[i].vy, particleSystem.fishParticles[i].vx);
    }
    rotate(fishAngle[i]);
    image(fishImg[i],0,0);
    translate(-fishImg[i].width/2, -fishImg[i].height/2);
    popMatrix();
How does this work? Well, pushMatrix() and popMatrix are used so that the transformations that are applied in between them, do not effect the rest of the sketch. To read more about this, check out this article.

We have to move the entire grid to the origin, and adjust for the image position as well. This way when we apply the rotate with the angle, the image will be rotated about the origin. If we did not do the transformations before the rotation, the rotation would not be about the right point- causing it to look like a 'wide turn'.

After the rotation occurs, we can draw the image, and translate the grid once more for some final adjustments. Then popMatrix will restore the grid back to its original position.

Near Tail
The next aspect of the fish to discuss is how we determine if they are near Botbait's tail or not. It's not exactly magic- we assume that Botbait's tail is positioned in the middle of the screen, and that there is a certain area extending from the middle where they would be near the tail.

This is how their position is checked:

void checkForFishies() {
 int count = 0;
 for(int i=0; i= 0.5-0.25 && fishNormX <= 0.5+0.25) {
     count++;
   }
 }
 if(count >= 0 && millis()-lastFishCountSend >= 1000) {
   if(connected) sendSerial(fishNumSerial, count);
   lastFishCountSend = millis();
 }
}
We normalize the X position so that it is easier to check for on multiple screen dimensions. We only send the message to the Arduino every 1 second, to avoid spamming it.

---

That is about it for the fishes! There are so many more things that you can make the fish do... some ideas are: making them blink, change sizes, colours, even blow bubbles.

Fun Stuff!


Congrats on reading about Botbait and the Space Fish. Hopefully you learned some new things, and have some ideas/inspiration on how to modify the application for your own Botbait!

"I just learned how Botbait and the Space Fish works! @RoboBrrd"
Tentacle Mechanism I just learned how Botbait and the Space Fish works! #RoboBrrd